Mastering Video Calling: Tools for Face-to-Face Connections
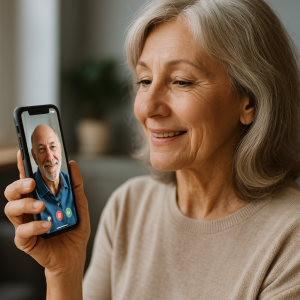
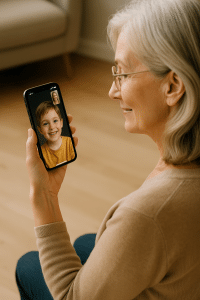
Staying connected with loved ones is important no matter where we are or how old we get. Thanks to video calling, it’s easier than ever to see and talk to family and friends face-to-face, even if they live far away. For many seniors, learning how to use this technology opens up wonderful opportunities to share special moments, join group chats, and feel less alone. Video calls can change the way we connect, making it more personal and interactive than a regular phone call.
This lesson is designed to help you understand video calling and how to use it comfortably and safely. We will guide you through the most popular apps made for video calls, explain how to set up accounts, and show you tips for scheduling and joining meetings. You’ll learn easy ways to adjust your sound and picture, invite family and friends, and enjoy group conversations. We also address important safety features so you can keep your calls private and secure.
Whether you’re using a smartphone, tablet, computer, or a special device designed for seniors, this lesson will give you the confidence and knowledge you need. You’ll see that video calling isn’t just for the young or tech-savvy—it’s for everyone who wants to share smiles, laughter, and stories with the people who matter most. As you learn, you’ll find that the right tools, clear steps, and friendly tips make video calling a simple and joyful way to stay close with your community and family.
With practice, you’ll discover how easy it is to overcome the challenges of new technology. We’ll help you build skills to use video calls securely, communicate clearly, and manage your devices comfortably. This can reduce feelings of isolation, increase your independence, and bring more warmth into everyday life. So, let’s dive into mastering video calling and unlock new ways to connect and enjoy time with your loved ones, no matter the distance between you.
Video calling apps are tools that let people talk to each other using video and sound over the internet. These apps work on smartphones, tablets, and computers. For seniors, choosing the right video calling app is important because it helps them stay connected with family and friends easily and comfortably. Many popular apps aim to be simple and friendly for older adults, offering clear buttons, easy controls, and helpful features. In this section, we will look closely at some of the most popular video calling apps and what makes each one special.
Understanding these apps helps seniors find one that fits their needs, whether they want to talk one-on-one or have group chats, use special devices, or enjoy extra accessibility features.
FaceTime: Simple and Clear for Apple Users
FaceTime is a video calling app made by Apple, and it comes already installed on iPhones, iPads, and Mac computers. Because it’s built into Apple devices, seniors don’t have to download or set up anything extra. This makes FaceTime very easy to use—just pick a contact and start a call with a tap.
One of the best things about FaceTime is its great video and sound quality. The pictures and voices come through very clearly, almost as if you were in the same room. It also includes features like Group FaceTime, where up to 32 people can join a video call at the same time, which is great for family gatherings.
Another helpful feature is the integration with the Contacts app. Seniors don’t have to remember phone numbers or email addresses; FaceTime uses the contacts already saved on the device. Plus, if the senior uses Siri, the voice assistant on Apple devices, they can even ask Siri to place a FaceTime call just by saying the person’s name. This voice command can make video calling easier for those who find touching the screen tricky.
The main limit of FaceTime is that it only works on Apple devices. So if family members use Android phones or Windows computers, they won’t be able to join FaceTime calls. But for seniors and families with Apple products, it’s a smooth and simple choice.
Zoom: Flexible and Good for Groups
Zoom is another very popular video calling app. It works on many devices including smartphones, tablets, and computers, and it is not limited to a single brand. This makes Zoom a flexible option because it allows users with different devices to connect easily.
One big advantage of Zoom is that it supports large group video calls with up to 100 participants. This is ideal for big family events, birthday parties, or even social club meetings. A special feature called “gallery view” lets you see many people on the screen at once, making it feel more like a real gathering.
Zoom is also friendly for seniors because people who join calls do not always need to create an account. The organizer of the meeting sends a link or meeting number, and anyone can join with a simple tap or click. This cuts down on confusing steps like signing up or remembering passwords.
However, Zoom has many extra features like breakout rooms—small separate groups inside a larger meeting—that can be hard to understand at first. While these features are helpful for some, seniors might want to focus on just the basic video call options to keep things simple.
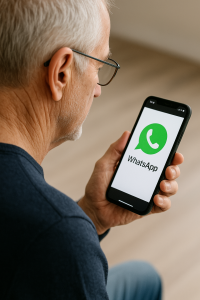
WhatsApp: Popular and Easy for Everyday Use
WhatsApp is mainly known as a texting app, but it also supports video calling. It works on almost all smartphones, both Apple and Android, making it very common and easy to find. Many seniors already use WhatsApp to send messages and photos, so adding video calls is natural.
WhatsApp offers secure, encrypted calls, meaning the conversations are private and protected. It allows group video calls with up to eight people, which is perfect for small family chats. The interface is simple with big buttons and clear menus, which helps seniors who want straightforward video calls.
One thing to know is that WhatsApp’s video call quality is good but may not be as crisp or smooth as FaceTime or Zoom. Also, it focuses more on text messaging, so some seniors might prefer apps that are built mainly for video calls.
Google Duo: Reliable for Mixed Devices
Google Duo is a video calling app that works on both Android and Apple devices. This makes it a strong choice for families using different types of phones and tablets. Duo is designed to work well even if the internet connection is slow or weak, which means fewer dropped calls or frozen screens.
The app is easy to use with a clean design and large buttons that seniors will find simple to tap. Duo supports video calls with up to 12 people and allows users to leave video or audio messages if someone can’t answer right away.
Because it works across many devices and handles low internet speeds well, Google Duo is a dependable option for seniors who want a fuss-free video calling experience.
Special Devices for Seniors: Video Calling Made Simpler
Besides popular apps, there are also special devices designed just for seniors to make video calling even easier. These devices often have big screens and one-touch buttons so seniors don’t have to touch complicated screens or menus.
For example, the ViewClix Smart Frame is a device with a large screen that shows photos, videos, and lets family members call their senior loved ones with simple apps on their side. Seniors don’t have to learn new technology; the family sets up and manages the device remotely. Calls connect automatically, so seniors just answer or even have calls connect without needing to press buttons.
Another device is the Amazon Echo Show. This is a smart speaker with a screen that responds to voice commands. Families can call seniors using a “drop-in” feature that connects automatically without the senior having to do anything. This is helpful for seniors who find technology confusing or have memory problems. However, the video quality might not be as high as apps on smartphones or tablets.
These devices are made to reduce the stress of using new technology and help seniors stay socially connected in a friendly, hands-off way.
What Makes These Apps Popular for Seniors?
Across these popular video calling apps and devices, several features stand out that make them good choices for seniors:
Simple Design: Large buttons, clear text, and easy menus help seniors avoid confusion.
Compatibility: Apps that work on many devices (Apple, Android, Windows) make it easier for families to connect.
Accessibility: Features like subtitles, voice commands, and adjustable text size support users with hearing or vision challenges.
Reliability: Stable connections with minimal lag or dropped calls make conversations smooth and enjoyable.
Group Calling: Options to have multiple family members join a single call allow for fun group chats.
Security: Encryption helps keep conversations private and safe from others.
Choosing the right app or device depends on the senior’s comfort level with technology, the devices they already own, and the preferences of their family members. By understanding what each popular option offers, seniors and their families can pick tools that help them stay close, no matter the distance.
Creating and Managing Your Video Calling Accounts
Before you can start making video calls with family and friends, you need to set up an account for the video calling service you want to use. An account is like your personal online profile. It helps the app or device recognize who you are and lets you connect with others safely. Setting up an account might sound tricky, but it can be easy if you take it step by step.
Many video calling apps, such as Zoom, Google Meet, and GrandPad, require you to create an account before you start using them. Here’s a simple way to understand the process and what you need to do.
Step 1: Choosing Your Device and Service
First, decide what device you will use for video calls. This could be a smartphone, tablet, computer, or a special video calling device made for seniors. Some devices come with video calling apps already built in, while others require you to download apps like Zoom or Google Meet.
Once you have your device, think about which video calling service you want to use. Some popular choices for seniors include:
Zoom: Easy to use and popular for group calls.
Google Meet: Works well with Google accounts and is simple to join via a link.
GrandPad: A tablet designed especially for seniors with built-in video calling.
ONSCREEN Moment: Connects to your TV for large screen calls.
Each service has its own way to set up accounts, but many share similar steps.
Step 2: Gathering Needed Information
To create an account, most services will ask for some basic information. Here’s what you might need:
Email address: This is your online mailing address. It’s where the service will send important messages, like invitations or password resets.
Date of birth: Some services ask for this to make sure you are old enough to use their platform.
Create a username or ID: This is a name that other people will see. It can be your real name or a nickname.
Create a password: A secret word or phrase that keeps your account safe. It should be something only you know.
If you do not have an email address yet, you will need to set one up first. Many free email services are easy to use and can be set up with help from family or support services.
Step 3: Signing Up for an Account
To create an account, follow these simple steps:
Go to the website or open the app of the video calling service you chose.
Look for a button that says “Sign Up,” “Create Account,” or “Register.”
Fill in the information requested, like your email, date of birth, and name.
Make a strong password. A good password has letters, numbers, and symbols. For example, “Sunshine2025!” is stronger than just “sunshine.”
Some services may ask you to enter a code sent to your email or phone to verify it’s really you.
Read and agree to the terms of service or privacy policy. These explain how your information is used. If you’re unsure about this, ask a trusted family member or friend to help explain.
After completing these steps, you will have an account!
Step 4: Managing Your Account
Once your account is set up, you can personalize it and keep it safe by doing a few important things:
Update your profile: You can add a photo or change your display name so your family recognizes you.
Manage contacts: Some apps let you create a list of approved family and friends who can call you. This helps keep your calls private.
Adjust notification settings: Decide if you want alerts when someone calls or sends a message.
Keep your password safe: Don’t share it with anyone except trusted family members who help you with technology. Change it every few months to stay secure.
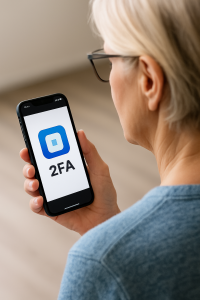
Enable two-factor authentication: This is an extra step for security where you enter a code sent to your phone or email when logging in. It helps protect your account from being hacked.
Step 5: Understanding How to Log In
After creating your account, you will need to log in every time you want to make a video call. Logging in means entering your username or email and your password into the app or website.
Here’s a simple way to think about logging in:
Your username/email is like your home address—it tells the app where to find your account.
Your password is like the key to your house—only you (or someone you trust) should have it.
Some devices and apps can remember your login details so you don’t have to enter them every time. This can make it easier, but be sure only your trusted device does this to keep your account safe.
Step 6: Tips for Remembering Account Information
It can be hard to remember usernames and passwords, but there are safe ways to keep track of them:
Write them down: Keep a small notebook or card in a safe place at home with your usernames and passwords. Do not leave this where people you don’t trust can find it.
Use password hints: Some apps let you add a hint to remind you of your password without giving it away.
Ask for help: Family members or friends can help you use a password manager app. These apps store your passwords securely and fill them in for you when needed.
Remember, never share your passwords with strangers or post them online. Keeping your account secure helps protect your privacy and keeps your video calls safe.
Step 7: Creating Accounts for Special Video Calling Devices
Some devices made especially for seniors, like the GrandPad or ONSCREEN Moment, have their own way of setting up accounts. These devices often come with customer support to help you get started.
For example, with GrandPad:
You get a tablet with a built-in secure family network.
Only family members you approve can call you, which makes it safer and easier to use.
Customer care is available 24/7 to help with setup and questions.
Other devices like the ONSCREEN Moment connect your video calls directly through your TV. Setting up these devices usually includes:
Connecting the device to your TV and home Wi-Fi network.
Creating an account through their app or website.
Setting up an easy-to-use remote control for answering calls.
Linking approved family members to your account.
Because these devices are designed for ease of use, the setup tries to be as smooth as possible. Still, if you find any steps confusing, it’s always a good idea to ask for help from customer support or a tech-savvy friend.
Step 8: Signing Up Without an Account (Joining Calls)
Some video calling services allow you to join a call without creating an account. For example, Google Meet lets you join a meeting by clicking on a link sent by a family member or friend. This is helpful if you prefer not to create an account or if someone else is hosting the call.
Keep in mind that while joining without an account is simpler, having your own account offers more features and easier access to calls. If you plan to make calls yourself or join meetings often, setting up your own account is best.
Summary of Account Setup Essentials for Video Calling
Here’s a quick checklist to keep in mind when setting up accounts for video calling:
Choose a device and video calling service that fits your needs.
Gather your email and other personal information needed for sign-up.
Create a username and a strong password to keep your account secure.
Verify your email or phone number if required by the service.
Keep your login details safe and remember how to sign in.
Use extra security features like two-factor authentication if available.
Ask for help from family, friends, or customer support if you get stuck.
By carefully following these steps, you will have your video calling account ready. This will let you easily connect face-to-face with your loved ones, no matter where they are.
Scheduling and Joining Video Meetings
One of the most important parts of using video calling tools is knowing how to set up meetings ahead of time and then join them when it's time. This allows you to connect with your family, friends, or groups without confusion and ensures you don’t miss out on special gatherings or important events. We’ll break down this process into simple steps to make it easy and clear.
What Does Scheduling a Video Meeting Mean?
Scheduling a video meeting means choosing a specific date and time for everyone to join a virtual meeting. Think of it like planning a get-together at a certain hour, but instead of meeting in a park or a home, you meet online through a video app.
When you schedule a meeting, you usually get a special invitation that has all the details you and others need, like when it starts, how to join, and sometimes even a password to keep the meeting private.
How to Schedule a Video Meeting
Different video calling apps have their own ways to schedule meetings, but most follow a similar simple process. Here’s what you usually do:
Open the app or website: For example, Zoom, Skype, or Microsoft Teams.
Find the “Schedule” or “New Meeting” button: It’s often in the main menu or home screen once you log in.
Pick a date and time: Choose when you want the meeting to happen. If you’re scheduling for a group, pick a time that works for everyone.
Set a meeting name: Give your meeting a title, like “Sunday Family Chat” or “Book Club.” This helps everyone know what the meeting is about.
Choose meeting settings: You might set options like whether people can join before you start the meeting, or if a password is needed to keep it secure.
Invite participants: Add the emails or usernames of the people you want to join. They will get an invitation with all the details.
Save the meeting: Once you save, the app will create a special meeting link or ID that people use to join.
For example, if you schedule a Zoom meeting, the app will generate a meeting link and send emails to your guests. This link is like a digital doorway to your meeting room.
Understanding Meeting Invitations
Once you schedule a meeting, the most common way to invite family or friends is by sending an email invitation. This invitation includes:
Meeting link: This is a web address that you click to enter the meeting.
Meeting ID: A number code that identifies your meeting.
Password: Some meetings have passwords, like a secret code, to keep things private.
Date and time: When the meeting will start, usually shown with the time zone, so everyone knows exactly when to join.
The invitation might also have instructions on how to join, especially if some participants are new to the app. It’s a good idea to keep this invitation email handy so you can easily join at the right time.
Joining a Video Meeting: Easy Steps
When it’s time to join your scheduled video meeting, you’ll usually follow these steps:
Click the meeting link: This is the easiest way. The link will open the video calling app or website directly to your meeting room.
Or go to the app and enter the meeting ID: If you don’t have the link, you can open the app manually and type in the meeting ID and password.
Turn on your video and audio: When joining, the app usually asks if you want to join with video so others can see you, or just audio if you prefer. You’ll also choose your microphone option to hear and speak.
Wait to be admitted: Some meetings have a waiting room, where you wait until the host lets you in. This keeps the call secure and helps avoid uninvited guests.
For example, to join a Zoom meeting:
You click the “Join Zoom Meeting” link in your invitation email.
If it’s your first time, you might download the Zoom app when prompted.
Next, Zoom shows a preview of your camera. You decide if you want to join with video or just audio.
Click “Join with Computer Audio” so you can hear and speak.
If there is a password, enter it when asked.
Sometimes, if you don’t have a computer or internet, you can even join by phone. The invitation usually has a phone number and meeting ID you can call to listen and talk during the meeting.
Using Reminders to Never Miss a Meeting
It’s easy to forget when a meeting is scheduled, especially if you have many appointments. Here are some ways to stay on track:
Add the meeting to your calendar: Most video apps let you save the meeting details to your digital calendar (like Google Calendar or Apple Calendar). This way, you get reminders before the meeting starts.
Set alarms: Use an alarm on your phone or watch to remind you a few minutes before the meeting.
Write it down: If you prefer, keep a paper calendar or notebook with meeting times written clearly.
Reminders help you be ready and reduce the stress of rushing to join a meeting last minute.
What to Do If You Can’t Join Right Away
Sometimes, technical problems or other reasons may delay your joining. If you miss the start, don’t worry. Here’s what you can do:
Join as soon as you can: Most meetings stay open for a while, so just click the link or enter the meeting ID when you’re ready.
Contact the host if possible: If you have trouble joining, calling or texting the person who scheduled the meeting might help. They can resend the invite or assist.
Check your device: Make sure your internet is working and your video calling app is updated.
Understanding Time Zones When Scheduling
When you schedule a video meeting with people in different places, time zones can be confusing. A time zone is a region where the clock time is the same. For example, when it’s 3 PM in New York, it might be 12 PM in Los Angeles.
To avoid mix-ups:
Confirm the meeting time in everyone’s local time: Many scheduling apps show the meeting time adjusted automatically for each person’s time zone.
State the time zone clearly in your invitation: For instance, say “Meeting at 2 PM Eastern Time (New York).”
Use tools to convert times: Online time converters can help you check what time the meeting is in your area.
Taking time zones into account helps everyone join at the right time without confusion.
Tips for Managing Scheduled Meetings on TV Video Calling Devices
Some seniors use special video calling devices that connect to their TV, like ONSCREEN Moment or GrandPad tablets. These devices often have simple ways to schedule and join meetings:
Use the remote control: Many TV-connected devices let you schedule or join calls using the normal TV remote, making it easy to navigate.
Auto-answer features: Some devices can be set to answer calls automatically at scheduled times, so you don’t have to press anything to join.
Show meeting reminders on the TV screen: Certain devices display reminders or notifications so you don’t forget when a call is coming up.
These features help seniors with less experience in technology to stay connected comfortably.
Practice Makes Perfect: Getting Comfortable with Meetings
Joining and scheduling meetings can feel tricky at first, but with practice, it gets easier. It’s a good idea to do a test call with a family member or friend to:
Try scheduling a meeting together.
Practice joining on time.
Make sure your microphone and camera work well.
Learn how to mute or unmute yourself and turn video on and off.
This practice helps you feel more confident and ready for real meetings.
Adjusting Audio and Video Settings for the Best Video Call Experience
When you join a video call, seeing and hearing your loved ones clearly is very important. Sometimes, the sound might be too quiet or too loud. Or, the picture might be blurry or not well lit. Knowing how to adjust the audio (sound) and video (picture) settings can make your video calls much more enjoyable and easier to use. This section will guide you through the key steps and tips to adjust these settings so your calls feel comfortable, clear, and friendly.
Think of your video call like a live TV show. If the microphone is too far away, people won’t hear you well. If the camera is too close or too far, you might look blurry or too small. By making a few small changes, you can improve how you look and sound, just like adjusting a radio or TV to get the best picture and sound quality.
Improving Audio Quality: Making Sure Everyone Hears You Clearly
Good sound is the most important part of a video call. If people can’t hear you well, then the whole call becomes frustrating. Here are some easy ways to improve your audio:
Use Headphones with a Microphone: Using headphones with a built-in mic helps a lot. This stops the computer’s speakers from causing an echo or feedback. For example, if you use the computer speakers, your microphone might pick up the sound and send it back, creating a confusing loop of sound. Headphones keep your voice clear and prevent these problems.
Keep the Microphone Close: The closer the microphone is to your mouth, the clearer your voice will sound. Just like when you talk into a telephone, holding the mic close helps the other person hear every word. Many headphones have a microphone attached to the wire near your mouth, which works well.
Choose a Quiet Room: Background noise like pets, kids, or the TV can make your voice hard to hear. Find a quiet spot for your calls. Rooms with soft furniture, curtains, and carpets can also help by reducing echo, making your voice sound clearer.
Adjust the Volume: Make sure your volume is not too low or too loud. You want to hear the other people comfortably without distortion or sudden loud sounds. You can adjust this on your device or in the video call app settings.
Mute When Not Speaking: To reduce background noise, mute your microphone when you are not talking. This keeps the call calm and focused on whoever is speaking.
By following these tips, your voice will come through clearly, and you’ll hear others better too. This makes conversations more natural and less tiring.
Enhancing Video Quality: Look Your Best on Screen
The video part of your call is about how you and the other person see each other. Good video quality means a clear picture, proper lighting, and good camera angles. Here’s how to improve your video for a friendlier and clearer look:
Position Your Camera at Eye Level: Imagine you’re looking into someone’s eyes when you talk. The camera should be at about the same height as your eyes. This makes it feel like you are really looking at the person, creating a more natural conversation. You can use books or a stand to raise your laptop or tablet to the right height.
Face the Light Source: Good lighting helps your face look bright and clear. Try to sit facing a window or a lamp so the light shines on you, not behind you. If the light is behind you, you might look like a shadow, which makes it hard for people to see you.
Choose a Simple Background: Make sure the area behind you is tidy and not too busy. A plain wall or a neat room works best. Too many objects, bright colors, or movement in the background can distract the people you are talking to.
Check Your Camera Lens: Sometimes the camera lens can get dusty or smudged. Wipe it gently with a soft cloth to keep the picture clear and sharp.
Avoid Tilting Your Device: Keep your device steady on a flat surface. Tilting screens can make your picture look strange or make it harder for others to see you properly.
These small changes help your video look bright, clear, and natural. Your friends and family will appreciate seeing your face well during calls.
Simple Steps to Adjust Audio and Video Settings on Your Device
Most devices and video calling apps let you adjust audio and video settings easily. Here’s how you can find and change these settings step-by-step:
Find the Settings Menu: When you start a video call or open your video app, look for a gear icon or a button labelled “Settings” or “Preferences.” This is where you can adjust sound and video options.
Microphone and Speaker Setup: In the audio settings, you can choose which microphone and speakers to use if your device has more than one option. For example, you can select your headphones’ mic instead of the built-in mic. You can also test the microphone to make sure it’s picking up your voice.
Adjust Volume Levels: You can raise or lower the speaker volume here, so you can hear others clearly without the sound being too loud or too soft.
Camera Selection and Preview: In the video settings, select the camera you want to use if your device has multiple cameras. Often, laptops have one built-in camera, but tablets or smartphones may have front and back cameras. You can usually see a preview to check how you look before joining the call.
Turn On or Off Video Features: Some apps let you enable features like “touch-up” effects, which smooth your skin or brighten your lighting. You can turn these on or off depending on your preference.
Test Your Setup Before Calls: Most video apps have a test call feature. Use it to try your microphone and camera before you call someone. This saves time and prevents surprises during the call.
By spending a few minutes adjusting these settings, you can make your calls more comfortable and enjoyable.
Using Voice Commands and Remote Controls for Easier Adjustments
Some video calling devices designed for seniors come with special features to make adjusting audio and video easier. For example:
Voice-Controlled Devices: Devices like the Amazon Echo Show or Google Nest Hub Max allow you to use your voice to adjust volume or start calls. Saying “Alexa, turn up the volume” or “Hey Google, answer the call” can be easier than using buttons.
TV-Based Video Calling Devices: Products like JubileeTV or ONSCREEN Moment connect to your television. They often use the TV remote control to adjust sound and volume, making it very familiar and simple for seniors who already use a TV remote.
Auto-Answer Features: Some devices can automatically answer calls, so seniors don’t need to press any buttons. This can be a big help if using remotes or touchscreens is difficult.
These features reduce technical steps and make video calls more accessible for anyone who might struggle with small buttons or complicated menus.
Practical Tips for Clearer Calls Every Time
Here are some extra tips to keep your video calls sounding and looking their best:
Keep Devices Charged: Make sure your device has enough battery or is plugged in before the call. Low power can cause poor audio and video quality.
Close Other Apps: Closing other apps that use the internet or your microphone can improve call quality by giving the video app more resources to work well.
Restart Devices Sometimes: If your audio or video isn’t working right, try turning your device off and on again. This simple step can fix many problems.
Use a Wired Internet Connection: If possible, use a wired internet connection or sit close to your WiFi router. This helps prevent video freezing or sound cutting out.
Speak Slowly and Clearly: Even with good audio, speaking clearly helps others understand you better. Remember, small background noises can make it harder to hear if you talk too fast.
Following these tips makes all your video calls smoother and more fun.
Understanding Common Audio and Video Problems and How to Fix Them
Sometimes, even with the best setup, problems happen. Here are some common issues and simple fixes:
Sound Echo or Feedback: This happens when the microphone picks up the sound from your speakers. Fix it by using headphones or lowering the speaker volume.
Video is Blurry or Dark: Check your lighting and clean the camera lens. If your internet connection is slow, video quality may drop. Try moving closer to the router or closing other internet apps.
Microphone Not Working: Make sure your microphone is selected in settings and not muted. Restarting the device can also fix this.
Camera Not Showing Video: Check that the camera is allowed to be used by the app in your device’s privacy settings. Sometimes, restarting the app or device helps.
Knowing these common problems and their solutions can save you time and frustration.
Inviting Family and Friends to Calls
One of the most important parts of video calling is inviting family and friends to join the call. This step helps you see and talk with the people you care about, whether they live nearby or far away. Inviting others to join a video call might feel tricky at first, but once you understand the basics, it becomes easy and even fun. In this section, we'll explore how to invite people to video calls in a clear and simple way, with helpful tips to make the process smooth and enjoyable.
When you want to invite someone to a video call, you are asking them to join you on their device so you can see and hear each other. This could be a phone, a tablet, a computer, or a special video calling device made for seniors. Here’s how to think about it and what steps to take.
Choose Who to Invite
Before sending an invitation, think about who you want to talk with. It could be your children, grandchildren, close friends, or other family members. Sometimes, deciding who to invite depends on how many people you want on the call. Some video call platforms allow a few people, while others can have many participants.
Also, keep in mind the comfort level of the person you want to invite. If they are not familiar with video calls, you might want to invite only one or two people at a time to keep things simple. For larger family gatherings, you can plan group calls, but it's helpful to make sure everyone knows how to join ahead of time.
Send Clear Invitations
Once you know who you want to invite, the next step is to send them an invitation. Depending on the video calling app or device you are using, invitations can be sent in different ways:
Calendar Invite: Many apps allow you to create an event on a calendar and add guests. When you do this, the guests get a message with all the call details automatically added to their calendar. This helps them remember the day and time of the call because their phone or computer will remind them.
Message or Email: You can send a simple message or email with a link to join the call. This link is like a special door that opens the call on their device. Make sure to include the date and time of the call, so your guests know when to click the link.
Phone Call: Sometimes, a phone call is the best way to invite family or friends. You can talk to them, explain how the call will work, and even help them prepare if they need assistance.
If you are inviting someone who is not very comfortable with technology, it’s a good idea to send step-by-step instructions along with the invitation. For example, you can write out simple directions like, “Click the link below 5 minutes before 3 PM on Saturday, and the call will start.” This helps reduce confusion and makes them feel more confident.
Using Meeting Links: What Are They?
Most video calling platforms use something called a “meeting link” or “join link.” This is just a special web address that connects people to the same video call. When you send this link to your family or friends, all they have to do is click on it at the right time, and the video call will open automatically on their device.
Think of the meeting link as an invitation card with a unique address on it. Instead of going to someone’s house, you go to this virtual place by clicking the link. It’s important to keep this link private and only share it with the people you want on the call to keep it safe and secure.
Explaining the Invitation to Seniors
Sometimes, seniors might feel unsure about what to do when they get an invitation. To help them, it’s useful to explain the invitation in simple words and maybe practice once or twice before the actual call. Here’s a way to explain it:
“You will get a message or an email with a special button or link to click.”
“When you click that link, the video call will open, and you will be able to see and hear everyone.”
“If you are unsure, you can call me on the phone, and I will help you.”
Also, remind them that it’s okay to take their time and ask questions. Patience is important, and with practice, they will get more comfortable.
Inviting People Who Use Different Devices
One challenge when inviting family and friends is that not everyone uses the same kind of device. Some may have an iPhone, others an Android phone, or a Windows computer. Most video calling platforms work across many devices, but the way people join might look a little different on each one.
For example, if you are using FaceTime, only people with Apple devices (like iPhones, iPads, or Macs) can start calls, but others on Android or Windows can join if you send them a FaceTime link. Other apps like Zoom work well on almost all devices and even on smart TVs.
It’s a good idea to ask your family or friends what kind of device they have before sending the invite. That way, you can choose the best app or platform for everyone to join easily.
Using Phone Numbers or Email Addresses to Invite
Many video call apps let you invite people by typing their phone numbers or email addresses. When you do this, the app sends an invitation automatically to their device. This way, your guests don’t have to search for the call—it will appear ready for them.
For instance, if you use an app like WhatsApp or Skype, you can simply select the person’s contact from your list, tap the call button, and they will get a notification to join. This is more direct and easy, especially if your contacts are saved on your device.
Setting Up a Family Group for Quick Invites
To make inviting easier for future calls, many platforms let you create a “group” with your family or friends. When you want to start a call, you just invite the whole group at once instead of adding each person one by one.
This works like a family or friends club where everyone in the group gets invited to join with one click. It saves time and helps everyone stay connected regularly without the hassle of sending multiple invitations.
Reminders and Follow-Ups
Sometimes people forget about the call or have trouble joining at the right time. It’s helpful to send reminders a day or a few hours before the call. You can do this by:
Sending a friendly message or call to remind them about the date and time.
Offering help to set up the call if they feel unsure or nervous.
Encouraging them to find a quiet, comfortable spot to enjoy the conversation.
After the call, you might also want to check in with your family or friends to see if they had any issues or want to join again. This keeps the connection warm and makes future calls easier.
Handling Multiple Invites and Group Calls
When inviting many people to a group call, it’s important to explain some simple rules to keep the call pleasant for everyone. You can ask participants to:
Mute their microphones when they are not talking to reduce background noise.
Take turns speaking and avoid talking over each other.
Be patient if someone has trouble connecting or hearing.
These little rules make the call more enjoyable and help seniors feel comfortable taking part.
Practical Example: How to Invite Using Zoom
Here’s a simple example of inviting family members using Zoom, one of the most popular video calling apps:
Open Zoom on your device and click “Schedule a Meeting.”
Choose the date and time for your call.
After scheduling, Zoom creates a meeting link automatically.
Click “Copy Invitation” to copy all the call details.
Send this invitation by email or text message to your family and friends.
When it’s time for the call, everyone clicks the link to join.
This process is similar in many other apps, so learning it once can help you invite people on different platforms.
Tips for Success When Inviting
Keep it simple: Use easy words and clear instructions.
Be patient: Some family members might need extra help or practice.
Use reminders: People like to be reminded, especially if they are new to video calls.
Practice together: Try a test call with one person before group calls.
Stay positive: Encourage everyone and celebrate small successes.
With these steps and tips, inviting family and friends to video calls becomes a smooth, friendly experience. It opens up the chance to see the faces and hear the voices of loved ones, making everyone feel closer no matter the distance.
Using Group Video Chat Features
Group video chats let you see and talk to several friends or family members at the same time. This can be a fun way to keep in touch, especially when everyone lives far apart or can't meet in person. Using group video calling can feel a bit tricky at first, but once you get the hang of the tools and features, it becomes a great way to share moments together, celebrate special events, or just catch up with loved ones.
Here, we will explore important group video chat features and explain how to use them to make your calls easier, more fun, and more connected.
How Many People Can Join a Group Call?
Most group video apps have a limit on the number of people who can join a video call. Some apps allow just a few people, while others can handle many more. For example:
WhatsApp lets you have up to 4 people in a group video call. This is good for small family chats or close friends.
Google Duo allows up to 32 people, which is great for bigger family gatherings or club meetings.
Skype can include up to 100 participants, making it useful if you want to involve a large group.
Viber supports up to 20 participants, which works well for medium-sized groups.
Knowing the limits helps you pick the right app based on how many people you want to talk with at once.
Starting and Managing a Group Video Call
To begin a group video chat, you usually start by creating a group or selecting multiple contacts to call. Here’s how that works in simple steps:
Create a Group: Many apps let you make a group of contacts, so you don’t have to select people one by one every time. For example, you can create a “Family” group with all your relatives’ contacts saved together.
Start the Call: When you’re ready, open the group chat and tap the video camera icon. Everyone in the group will get a notification to join the call.
Add More People: If you start a call but want to include someone else, many apps let you add new people during the call by tapping an “Add” or “Invite” button.
Managing the call becomes easier once you understand these steps, and it helps keep everyone included and involved.
Controlling Audio and Video During Group Calls
When you’re in a group video chat, sometimes you need to control your microphone or camera for a better experience. Here are some key features to know:
Mute and Unmute: If there’s background noise where you are, or if you’re not speaking, you can mute your microphone. This stops others from hearing sounds from your side. Just tap the microphone icon to mute or unmute yourself.
Turn Video On or Off: You can choose to show your video or turn off the camera if you just want to listen. This might be helpful if your internet is slow or if you need privacy for a moment.
Speaker or Headphones: You can switch between using your phone’s speaker or headphones. Using headphones can help you hear better and avoid echo during group calls.
These controls give you the power to manage how you participate, making calls more comfortable and clearer.
Using Chat and Messaging Features Inside Group Video Calls
Many group video apps offer a chat box alongside the video screen. This lets you send text messages while talking in the call. This is especially helpful when:
You want to share a link or an address without interrupting the conversation.
You need to write something that’s hard to say or remember.
Some people in the group prefer to type rather than speak.
For example, if your grandchild is showing a recipe during a video call, someone might type the list of ingredients in the chat box so everyone can see and save it.
Screen Sharing for Showing Pictures or Helping Out
Screen sharing is a useful feature that lets you show what’s on your phone, tablet, or computer screen to everyone in the call. This can be very helpful for seniors who want to:
Show photos from a recent trip or family event.
Help a family member with a problem by showing what you’re doing on your device.
Share a document, recipe, or presentation during a meeting or class.
To use screen sharing, look for an icon that looks like a screen or a box with an arrow. Tap it, and your device will ask for permission to share your screen. Everyone in the call will then see exactly what you are showing.
Using Reactions and Fun Features to Engage
Many video chat apps include fun features like reactions, emojis, or filters to make calls lively and enjoyable. For example:
You can “raise your hand” to signal you want to speak without interrupting.
Use smiley faces, thumbs up, or clapping icons to show you agree or like what someone says.
Some apps let you add animated effects or masks on your face to bring humor and lightness to calls.
These features help keep conversations friendly and interactive, especially during long group calls or when people are shy about speaking up.
Best Devices for Group Video Calling
Seniors find that some devices make group video chatting easier than others. Here are some tips:
Laptops and Computers: They usually have larger screens and easier-to-use mice or keyboards. Many seniors find these simpler for group calls, especially because laptops often provide clearer audio and video.
Tablets and Smartphones: These are handy and portable. Smartphones often come with video calling apps like FaceTime or WhatsApp pre-installed. Tablets have bigger screens than phones, which can make it easier to see everyone on the call.
Special Devices: There are devices made just for seniors that connect video calls to a TV screen. These can be very simple to use and help seniors who don’t want to use phones or computers.
Common Challenges and Helpful Tips
Using group video chat can sometimes be tricky. Here are some common challenges and easy tips to help:
People Talking at the Same Time: In group calls, it can get confusing if everyone speaks at once. Using the “mute” button when you’re not speaking helps keep the conversation clear.
Internet Problems: A slow internet connection can cause frozen video or bad sound. Try to use a strong WiFi signal or move closer to the router if possible.
Getting Lost in the Call: With many people on screen, it can be hard to focus. Most apps let you choose who to see up close or pin a speaker’s video so you can concentrate on them.
Learning New Features: Some features might seem confusing at first. It’s helpful to practice with a smaller group or one-on-one before joining a big group call.
Safety Tips When Using Group Video Calls
While group video calls are fun, it’s important to be safe online:
Only share the meeting link or invite with people you trust.
Use apps that offer security features like password-protected calls or waiting rooms where the host can approve who joins.
Be careful about what you share during calls—avoid showing personal information like home addresses or bank details on screen.
By following these simple safety steps, you can enjoy group video calls without worries.
Enjoying Group Video Chats Together
Group video calls are not just about talking. They can also include activities like:
Virtual Games: Some apps let you play games together while video chatting, like trivia or puzzles, which makes calls more fun.
Watching Videos or Shows: Screen sharing lets you watch a favorite TV show or family videos together, even if you’re miles apart.
Celebrations: Use group calls to celebrate birthdays, holidays, or special events with everyone joining in from home.
These activities help create shared experiences and strengthen family or community bonds.
With practice and patience, using group video chat features can open up new ways to connect and enjoy time with loved ones, no matter where they live.
Understanding Security in Video Calls
When we use video calls to see and talk with family and friends, it’s important to make sure those calls are safe and private. Just like you lock your door at home to keep your belongings safe, there are ways to lock your video calls so only the people you want can join. This helps protect your personal information and keeps your conversations private.
Video calls happen over the internet, which is like a big invisible highway that carries information back and forth. On this highway, information can sometimes be seen or taken by people who shouldn’t have access. That’s why security in video calls is very important. Let’s learn about how you can keep your video calls secure and what some of the key ideas mean in simple words.
What Is Encryption and Why Does It Matter?
Encryption is a big word, but it means something simple: it scrambles your video call so that only the people talking can understand what’s being said. Imagine you write a secret message using a special code that only your friends know how to read. Even if someone else finds the message, they won’t understand it because it looks like nonsense to them. That’s what encryption does for your video calls—it keeps your conversation a secret.
Most popular video call platforms use encryption to protect your chats. This means that when you talk or share videos during a call, the information is turned into a secret code while it travels over the internet. This way, hackers or strangers can’t listen in or steal your private information.
Strong encryption, like 128-bit AES (Advanced Encryption Standard), is so powerful that it would take millions of years for even the fastest computers to break that code. So, choosing video calling apps that use this kind of encryption is a smart way to stay safe.
Choosing Secure Video Call Platforms
Not all video call apps have the same security features. It’s best to use well-known and trusted apps like Zoom, Skype, FaceTime, Google Meet, or Microsoft Teams. These apps have teams that work hard to keep their services safe and up to date with the latest security technology.
One important security feature to look for is called end-to-end encryption. This means the video call is encrypted from your device all the way to the person you’re talking to, and no one else—including the company running the app—can see or hear the conversation. This is like having a private tunnel just for you and your friend where no one else can peek inside.
Before choosing an app, you can ask a family member or a tech helper about its security. Sometimes, apps also offer privacy settings to help you control who can join your calls or see your online presence. Make sure to explore these settings to keep your calls safe and comfortable.
Keeping Your Device Safe for Video Calls
Your device—whether it’s a smartphone, tablet, or computer—is the gateway to your video calls. Protecting it is an important step to keep your calls secure.
Here are some simple ways to protect your device:
Update your software regularly: Updates often include fixes for security problems. When your device asks to update, try to do it soon.
Use antivirus software: Antivirus programs help stop harmful software, called malware, which can spy on or harm your device.
Turn on your firewall: A firewall is like a security guard that watches the information going in and out of your device and blocks anything suspicious.
Be careful with links and files: Don’t click on links or download files from people you don’t know, even if they come through your video call chat. Sometimes, these can have harmful software.
By keeping your device safe, you help protect your video calls from being hacked or disturbed.
Privacy Tips During Video Calls
Privacy means keeping your personal life and information to yourself, or only sharing with trusted people. When you’re on a video call, there are simple ways to protect your privacy:
Choose a quiet, private place: Try to make your video calls in a room where others can’t overhear sensitive conversations.
Check your background: Be aware of what others can see behind you on the camera. Avoid showing personal papers, photos, or other private items that you don’t want others to see.
Don’t share personal information: Avoid saying or showing things like your full address, passwords, or bank details during video calls.
Inform others before recording: If you plan to record a video call, tell everyone on the call first. This is respectful and sometimes required by law.
These simple steps help keep your video calls private and comfortable.
Protecting Yourself From Unwanted Guests
Sometimes, strangers might try to join video calls uninvited. This is called “gatecrashing” or “Zoombombing.” To stop this, you can use features like:
Meeting passwords: Set a password for your video call so only people with the password can join.
Waiting rooms: Some apps let you place guests in a waiting room where you can decide if you want to let them in.
Lock the meeting: Once everyone you want is in the call, you can lock the meeting so no new people can join.
Using these tools helps you control who joins your calls and keeps unwanted visitors out.
Creating Strong Passwords and Using Multi-Factor Authentication
Your video call accounts often require passwords. A strong password is like a tough lock for your door—it keeps strangers out.
Here’s what makes a good password:
Use a mix of letters (both uppercase and lowercase), numbers, and symbols (like ! or #).
Make it longer—at least 8 characters.
Avoid using easy-to-guess words like your name, “123456,” or “password.”
It can be hard to remember all your passwords. You can use a special password manager app that safely stores your passwords for you.
Another way to protect your account is to use multi-factor authentication (MFA). This means you need to do two things to log in: enter your password and then confirm it with a code sent to your phone or email. It’s like needing a key and a secret handshake to get in—much harder for someone to break in.
Recognizing and Responding to Scams and Suspicious Activity
Sadly, some people use video calls to try to trick others. These scams might include someone pretending to be a friend or family member asking for money or personal information.
Here are signs of scams and what to do:
Unexpected requests: Be careful if someone you don’t know asks for money, your password, or other private details.
Pressure to act quickly: Scammers often try to rush you. Take your time to think and ask a trusted person for advice.
Strange links or files: Don’t click on links or download files sent by people you don’t trust.
If you feel unsure or think someone is trying to scam you, end the call and talk to a family member or friend you trust. It’s also good to report any suspicious behavior to the platform you are using or to local authorities.
Keeping Up With Online Safety Learning
Technology changes fast, and new safety tips come out regularly. One of the best ways to stay safe is to keep learning. Many communities offer free classes or help sessions for seniors to learn about internet safety and video calling security.
You can also find online videos or tutorials that explain how to protect your privacy and spot scams. Don’t be afraid to ask for help from family members, friends, or local organizations—they want to keep you safe and connected.
By staying informed, you will feel more confident and secure when using video calls to talk with the people you care about.
Tips for Clear Communication During Calls
Talking on the phone or video call can sometimes be tricky, especially for seniors who might face challenges like hearing difficulties or less experience with new technology. Clear communication during these calls helps everyone understand each other better, making conversations more enjoyable and less frustrating. Here are some detailed tips and ideas to help make phone and video calls clearer and easier to follow.
Choose a Quiet and Comfortable Place
Where you make your call matters a lot. If the room is noisy or busy, it’s hard to hear and understand what the other person is saying. Background sounds like a TV, radio, or conversations nearby can distract you and the person you’re talking to. So, try to find a quiet spot with little background noise. This helps your ears focus on the voice in the call, and the other person can listen better to you, too.
Also, make sure the place is well-lit if you are on a video call. Good lighting helps the other person see your facial expressions and lips clearly, which can help with understanding, especially for those who read lips or watch for visual cues during conversations.
Use a Good Quality Headset or Earbuds
Using a good headset or earbuds can make a big difference in how well you hear and how clearly you speak. Look for devices with noise-canceling features that reduce loud background sounds and focus on your voice. This is especially useful if you are in a place where some noise is unavoidable.
Headsets with a built-in microphone placed close to your mouth can pick up your voice better. This means the person on the other end will hear you more clearly without you needing to raise your voice. Comfortable headphones or earbuds also let you use the device for longer calls without discomfort.
Speak Slowly and Clearly
When talking, try to speak a bit slower than usual and pronounce your words clearly. This does not mean shouting or speaking loudly, but making sure each word is easy to hear and understand. If you speak too fast, it might be hard for the other person to keep up with what you are saying.
It’s also helpful to pause a little between sentences or thoughts. This gives the other person time to process what you said and get ready to answer. Think of it like taking breaths while reading a book out loud — it helps keep the conversation smooth and easy to follow.
Face the Microphone When Speaking
Where you place your device or microphone can change how well your voice is heard. Make sure to speak towards the microphone on your phone, tablet, or computer. If it’s a headset, keep the microphone close to your mouth but not too close that it picks up breathing sounds. Talking directly into the microphone gives the clearest sound for the listener.
If you are using a phone without a headset, hold it gently but firmly near your ear and mouth. Avoid covering the microphone with your fingers, as this can muffle your voice.
Check and Adjust the Volume
Before and during your call, test the volume on your device to make sure you can hear clearly. Sometimes the volume might be set too low or too high, causing difficulty in understanding the other person. Most devices have buttons on the side to increase or decrease volume easily. If you find yourself straining to hear, boost the volume a little.
In video calls, many apps have separate volume controls for speakers and microphones. You can adjust these settings to improve how loud you hear and how loud you sound to others. Sometimes switching to speakerphone or using headphones can help if you have trouble hearing through the device’s built-in speakers.
Reduce Background Noise Through Device Settings
Many modern phones and apps have built-in features to reduce background noise and improve voice clarity. For example, some smartphones offer “voice isolation” or “noise cancellation” modes that block out sounds like wind, traffic, or people talking nearby while focusing on your voice.
Activating these settings before your call can make a big difference in sound quality. If you aren’t sure how to turn these features on, ask a family member or caregiver for help, or look for instructions in your device’s settings under “sound” or “call settings.”
Make Use of Visual Clues and Gestures During Video Calls
In video calls, your face and body language become an important part of communication. Smiling, nodding, or using hand gestures can help show that you are paying attention and understand what the other person is saying. If something is unclear, you can point to objects or use simple signs to explain yourself better.
For example, if you want to ask someone to come to a certain room, you might say, “Please come here,” while pointing at the screen area that represents that place. Visual cues like these help when words alone might be confusing or hard to hear.
Be Patient and Give Time to Respond
Sometimes it takes a little longer for seniors to process what they hear and to reply. It’s important to be patient and give them enough time to think and answer. Don’t rush them or finish sentences for them. Waiting calmly encourages better conversation and helps avoid misunderstandings.
If you don’t catch what the other person said, politely ask them to repeat or say it in a different way. You can say, “I’m sorry, could you say that again more slowly, please?” Most people will be happy to help so the conversation goes smoothly.
Use Simple and Clear Language
When you talk, avoid using complicated words or phrases. Instead, use easy words and short sentences, just like you would when talking face-to-face. For example, instead of saying, “Would you prefer to commence our discussion in the sitting area?” say, “Would you like to talk in the living room?”
This helps reduce confusion and keeps the conversation straightforward. If you need to share instructions or information, break it down into small steps, and check that the other person understands each part before moving on.
Encourage the Use of Technology Tools to Help Hearing
Some seniors might benefit from hearing aids that connect directly to phones or video devices. These special hearing aids can make voices sound clearer and reduce background noise. If you or your loved one uses hearing aids, check if they have features that work with phones or Bluetooth devices. This can make calls easier to understand.
For those who don’t have hearing aids, using subtitles (closed captions) on video calls can also help. Many video calling apps offer this feature, which shows the spoken words as text on the screen in real time. This way, if hearing is difficult, you can read along to follow the conversation better.
Plan Call Times When Everyone is Alert and Ready
Choosing the right time for calls can improve communication. Pick times when you and the senior are not tired or distracted. Calling during meal times or when the person is busy might make it harder to pay attention and talk clearly.
Scheduling calls regularly and sticking to agreed times also helps by creating a routine. Knowing when calls happen can prepare everyone mentally and reduce stress about technology or conversations.
Practice and Learn Together
Sometimes, practicing how to use devices and apps before a real call can boost confidence and communication quality. Family members or caregivers can help seniors by doing trial video or phone calls, explaining basic steps, and answering questions.
It’s normal to have questions or need help at first. With practice, using these tools and talking clearly will become easier and more natural. Encouragement and patience from both sides make a big difference.
Check Internet and Device Connections
Good internet connection ensures the call doesn’t freeze or lose sound. If the connection is weak, voices can break up, making it hard to understand. Before starting a call, check that you have a strong Wi-Fi or cellular signal. If possible, use Wi-Fi instead of cellular data because it tends to be more stable.
Also, make sure your device has enough battery or is plugged in. If a device shuts off mid-call, it disrupts the conversation.
Use Visual Name and Call Reminders
Some seniors find it easier to recognize who is calling if the person’s name or photo appears on the screen. Using contacts with clear names and pictures helps identify calls quickly, so seniors feel more comfortable answering.
Setting call reminders on devices can help seniors remember when a call is scheduled, reducing missed calls and confusion.
Summing Up Communication Tips to Remember
Choose quiet, well-lit places for calls.
Use good headsets or earbuds with microphones.
Speak slowly, clearly, and face the microphone.
Adjust volume and turn on noise reduction features.
Use simple words and short sentences.
Be patient and allow time for responses.
Use visual clues and gestures during video calls.
Practice technology use regularly with help.
Check strong internet and device battery before calling.
Use subtitles and hearing aid features if helpful.
When these tips are followed, phone and video calls become easier and friendlier for seniors. Clear communication helps everyone feel connected and valued, making conversations more meaningful and enjoyable.
Bringing Families Closer: Your Journey with Video Calling
Video calling is a powerful tool that opens the door to closer connections with those we care about, no matter where they live. Throughout this lesson, you have learned about the many apps and devices available, how to set up and manage video calling accounts, and ways to make your calls clear and enjoyable. You now understand the steps to schedule meetings, invite family and friends, and use group chat features that let many people share moments together.
Beyond just learning how to use the technology, you have also discovered important tips for safe and private calls. Protecting your information by creating strong passwords, recognizing scams, and understanding privacy settings helps keep your conversations secure. Adjusting your audio and video settings, using accessibility features like subtitles or voice commands, and practicing clear communication make your calls more comfortable and meaningful.
Remember, the goal is to make video calling a natural part of your routine so it enhances your independence and confidence using devices. As this lesson is part of your ongoing journey with technology, the skills you have gained here will also help you explore other areas like browsing the internet safely, managing emails, or even shopping online. With every new skill, your ability to stay connected, informed, and empowered grows stronger.
Technology may seem challenging at times, but with patience, practice, and support, it becomes a friendly friend that brings warmth and joy. You have taken important steps toward reducing feelings of isolation, increasing social interaction, and enjoying the benefits of modern communication. Keep practicing, asking questions, and remembering that every video call is a chance to smile, laugh, and share life with family and friends—no matter the miles in between.
Your journey with video calling is just beginning, and the possibilities to stay connected are endless. Embrace these tools with confidence, knowing you have the knowledge and support to make the most of your conversations. The world of video calls is welcoming you with open arms, inviting you to be seen and heard in new, exciting ways every day.

 WhatsApp: Popular and Easy for Everyday Use