Personalizing Your Device: Accessibility and Comfort Settings
 Using a smartphone or tablet can open up many wonderful opportunities, from staying in touch with family and friends to managing health and enjoying entertainment. As we get older, it’s natural to find some parts of these devices a bit tricky—small letters, tiny buttons, or sounds that are hard to hear. The good news is that modern devices come with a variety of settings designed to make them easier and more comfortable to use. These settings help you tailor your phone or tablet to fit your needs, making it friendlier and less frustrating.
Personalizing your device means adjusting things like how big the text is, how loud sounds are, how your home screen looks, and even how your device talks to you. By understanding and using these features, you can increase your independence and confidence in using technology. You don’t have to struggle with squinting at small print or searching for apps in a confusing mess. Instead, you can take control over how your device works, creating a setup that feels just right for you.
In this lesson, we will explore a range of accessibility and comfort settings. You will learn how to change font sizes and display options to protect your eyes, turn on helpful voice assistants and screen readers, adjust sounds and vibration to match your hearing preferences, and arrange your home screen so it’s neat and easy to navigate. Additionally, you’ll discover how to set up emergency contacts to keep you safe, enable magnification and contrast features to see better, and fine-tune how your touchscreen responds to your touch. We will also look at ways to manage notifications and use Do Not Disturb mode so your device only alerts you when it truly matters.
All these tools work together to make your smartphone or tablet feel more like a helpful companion than a confusing gadget. The goal is to help you feel comfortable, confident, and connected—whether you are sending messages, making calls, using health apps, or simply enjoying your favorite activities online. With a little practice and personalization, your device can become easier and more enjoyable to use every day.
Changing Font Size and Display Options
As we get older, our eyes may have a harder time seeing small letters and numbers on screens. This can make using phones, tablets, or computers tricky. Luckily, most devices let you make the text bigger and adjust how things look on the screen. Changing these settings can make reading easier and reduce the strain on your eyes. This section will explain how you can change font sizes and other display options to make your device more comfortable to use every day.
Why Does Font Size Matter?
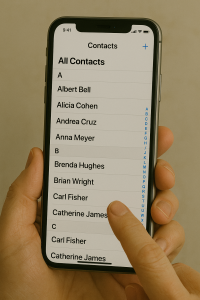
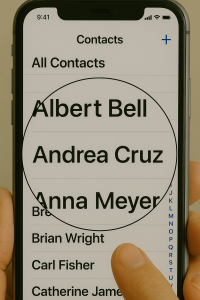
Font size means how big or small the letters and numbers appear on your screen. Small font sizes can be hard to read, especially if your eyesight isn’t as sharp as it used to be. When letters are too tiny, it can cause you to squint, lean closer, or feel tired after using your device for a short time. Bigger letters are easier to see and make reading less tiring. Research shows that many older adults prefer font sizes between 10.5 and 15 points on mobile devices. This size gives a good balance between fitting enough text on the screen and making the letters clear enough to read comfortably.
Imagine looking at a book with very small print or a newspaper with letters the size of tiny ants. It’s tough to read, right? Now imagine the print is large and bold—much easier to read. Your phone or computer screen works the same way. You can make the “print” on the screen larger so you don’t have to strain your eyes.
Adjusting Font Size on Smartphones
 Most smartphones let you change the font size right from the settings. Here’s how you can do it on two popular types of phones:
- For iPhones: Open the Settings app, then tap on “Accessibility.” Find “Display & Text Size,” then tap “Larger Text.” You’ll see a slider you can move to make the text bigger or smaller. You can also turn on “Bold Text” which makes the letters thicker and easier to read. This setting changes the size of the text in apps, menus, and messages.
- For Android phones: Open the Settings app and tap “Accessibility.” Look for options like “Font size” or “Display size.” Adjust the slider to make the font bigger or smaller. Some phones also offer “Screen zoom” which enlarges many screen elements, not just the text.
When you change the font size, you might notice that buttons and icons on the screen also change size. This helps make the whole phone easier to use, not just reading text. For example, on iPhones, choosing the “Zoomed” display mode makes the on-screen keyboard bigger along with other buttons, which is helpful if you find it hard to tap small keys.
Making Text and Display Easier to See on Computers
If you use a Windows computer, you can also adjust how text and other things look on the screen:
- Click the Start button, then choose Settings, followed by Accessibility.
- Under “Text size,” move the slider to make the text bigger. This changes the size of words in menus, buttons, and apps.
- If you want everything on the screen to be bigger—including pictures and app windows—look for “Display” or “Scale” settings within Accessibility. Choose a larger scale like 125% or 150% to zoom in everything.
Windows also has a built-in tool called the Magnifier. This is like using a magnifying glass for your screen. You can turn it on by pressing the Windows key and the plus sign (+) together. You can zoom in on part of the screen and move around with your mouse or fingers to see things more clearly. This is useful if you only need to enlarge a small area at a time, like when reading a tiny detail in a document or photo.
Choosing the Right Font Style for Comfort
Besides size, the style of the text also matters. Some fonts are easier to read than others. Simple fonts without extra decorations, like “Arial” or “Microsoft Sans Serif,” are usually better for older eyes. These fonts have clear letters and good spacing between characters. Fancy fonts with curly or thin letters might look nice but can be hard to read.
Many smartphones and computers let you change the font style along with the size. For example, in Android’s Accessibility settings, you can pick different font styles that suit you better. On iPhones, the system font is already designed for clarity, but turning on “Bold Text” can help make letters stand out more.
Spacing and Layout Help Reading
Spacing means the amount of space between lines of text and between letters. Older adults often find reading easier when there is more space between lines. This reduces the chance of skipping lines or mixing up letters. Some devices let you adjust line spacing and word spacing in advanced display settings or accessibility options.
For example, research has shown that older users prefer line spacing about 1.2 times the normal size. This means the blank space between lines is a bit bigger than usual. Increasing spacing helps the eyes focus better on each line without confusion.
On websites or reading apps, you can sometimes change these spacing settings directly. Also, using apps designed for reading, like e-book readers, often lets you adjust font size and spacing easily to your liking.
Balancing Screen Brightness and Text Visibility
 While changing font size helps, screen brightness and color contrast also affect how easy it is to read text. Bright screens with high contrast between text and background make letters stand out. For example, black letters on a white background or white letters on a dark background are easier to see than light gray text on a white background.
Many devices let you adjust brightness and enable high contrast modes in the display settings. While this isn’t the main focus here, it’s good to keep in mind that font size works best together with proper brightness and contrast for the most comfortable reading experience.
Tips for Finding Your Best Settings
- Start by making the text size a little bigger than usual. Try reading your favorite app or website to see if it feels comfortable.
- Adjust the font size gradually until you find the largest size that fits your needs without making navigation difficult or cutting off text.
- Try turning on bold text if available—it makes letters thicker and easier to see.
- Experiment with display zoom settings if your device offers them, to enlarge buttons and icons along with text.
- Remember that you can always change settings back if something doesn’t feel right.
- Practice using your device with the new settings. It might take a little time to get used to the changes.
Why Changing Font Size Can Improve Your Device Use
Changing font size and display options isn’t just about reading words better. It can help you feel more confident and comfortable using your smartphone, tablet, or computer. When you don’t have to squint or strain your eyes, you can enjoy talking with family, reading the news, or managing your appointments without frustration. Bigger, clearer text helps you avoid mistakes and speeds up your learning of how to use your device.
For example, if sending a text message feels easier because the keyboard letters are bigger, you might send messages more often and stay connected with friends and family. If reading about your health or taking online classes is less tiring, you’ll be more likely to use these helpful resources regularly.
Summary of Key Actions You Can Take
- Go into your device’s settings and find Accessibility or Display options.
- Adjust the font size slider to make text bigger.
- Turn on bold text if available.
- Try display zoom or “larger view” modes to increase button sizes.
- Pick a simple, clear font style if you have the choice.
- Experiment with line spacing if possible for easier reading.
- Use tools like Magnifier or zoom features to temporarily enlarge parts of the screen.
By taking these steps, you can personalize your device to fit your vision needs better. This makes everyday use easier, safer, and more enjoyable.
Enabling Voice Assistants and Screen Readers
Many seniors find voice assistants and screen readers very helpful for using their smartphones and tablets. These tools can make devices easier to control and understand, especially if you have difficulty seeing or using the touchscreen. Let’s explore how these technologies work and how you can turn them on and use them effectively.
What Are Voice Assistants and Screen Readers?
A voice assistant is a feature on your device that listens to your spoken commands and then helps you complete tasks. For example, you can ask it to send a text, make a phone call, or check the weather by just speaking. Popular voice assistants include Siri on iPhones, Google Assistant on Android phones, and Alexa on some smart devices.
A screen reader is a special program that reads aloud the text on your screen. It helps people who cannot see the screen clearly or at all by speaking the names of buttons, menus, and other items. Screen readers also tell you what’s happening on your device so you can use it without needing to look at the screen.
Both tools can make your device feel more friendly and less frustrating to use.
Turning On Voice Assistants
To start using a voice assistant, you need to turn it on in your phone’s settings. Here is how to do it:
- For iPhones (Siri): Open Settings, then tap Siri & Search. Turn on options called “Listen for ‘Hey Siri’” and “Press Side Button for Siri”. This lets you say “Hey Siri” to wake it, or press the side button to start talking.
- For Android phones (Google Assistant): Open the Google app and tap on your profile picture or initial. Go to Settings > Google Assistant. Turn on “Google Assistant” and enable voice activation so you can say “Hey Google” to start.
Once your voice assistant is on, try using simple commands like:
- “Hey Siri, call my daughter.”
- “Hey Google, send a text to John.”
- “Hey Siri, what’s the weather today?”
Voice assistants save you from typing or tapping many times, which can be hard if you have trouble seeing the screen or using fingers precisely.
Using Voice Assistants Effectively
Voice assistants work best when you speak clearly and use simple words. Here are some tips to get the most from them:
- Set up your contacts: Make sure your family and friends are saved in your phone’s contact list with easy-to-say names. This way, the assistant can quickly find the right person when you ask to call or text.
- Practice short commands: Try saying commands in short sentences, like “Send message to Mary” or “Set alarm for 7 AM.”
- Be patient with mistakes: Voice assistants sometimes misunderstand words, especially if there is background noise or unclear speech. You can quickly correct errors by saying “Change that to…” or “Delete message.”
- Use them for reminders and questions: Ask your assistant to remind you about appointments, take notes, or even answer simple questions like “How many teaspoons in a tablespoon?”
By using voice assistants, you can do many everyday tasks without needing to look at or touch your device as much.
Turning On Screen Readers

- For iPhones (VoiceOver): Go to Settings > Accessibility > VoiceOver. Turn on VoiceOver. When it’s on, your device will speak out loud what you tap or select. You can learn special gestures to control it.
- For Android phones (TalkBack): Go to Settings > Accessibility > TalkBack or sometimes called “Voice Assistant”. Turn it on to start hearing spoken feedback about what’s on your screen.
Once a screen reader is on, you will hear a voice describing what you touch on the screen and instructions on how to move around. This can feel a little tricky at first, but with practice, it becomes easier.
How to Use Screen Readers
Screen readers use special gestures to help you explore your device:
- Tap once to hear the name of a button, icon, or link.
- Double-tap to activate or open the item you selected.
- Swipe left or right to move to the previous or next item on the screen.
- Swipe up or down to change settings, like reading by words or by lines.
For example, if you want to open the phone app, swipe through the items until the screen reader says “Phone,” then double-tap to open it.
Benefits and Challenges of Screen Readers
Screen readers give people who have trouble seeing a way to use their devices independently. They can read text messages, emails, websites, and even describe pictures if alt text is included.
However, typing on a touchscreen while using a screen reader can be hard. Many users prefer to speak their messages using the voice assistant instead of typing. Also, screen reader users have to learn new gestures and commands, which can take some time and practice.
Remember, it’s okay to take your time to get used to these tools. Many seniors have shared that although it is a different way of using a phone, it helps them do everything a sighted person can do, just in their own way.
Combining Voice Assistants and Screen Readers
Using both voice assistants and screen readers together can make mobile devices much easier to use. For instance, if you want to send a message, you can ask the voice assistant to do it for you. The screen reader will then read back the message to make sure it looks right before sending.
This combination reduces the need to type or navigate complicated menus. It also gives you more freedom to use your device in a way that suits your vision and comfort.
Practical Examples for Seniors
 Imagine you want to call your doctor. Instead of searching your contacts, you can say, “Hey Siri, call my doctor.” The voice assistant will do it for you. If you want to read an email but cannot see the screen, turn on the screen reader, and it will read the message aloud.
If you are writing a longer email, you might talk to your voice assistant to dictate the message. Even though mistakes can happen in dictation, many users find this easier than typing on the tiny keyboard.
Some seniors find that voice assistants also help with daily reminders, such as taking medicine or attending appointments, by saying, “Hey Google, remind me to take my pills at 8 AM.” This helps with memory and staying organized.
Tips for Getting Comfortable
It’s normal to feel unsure at first when using voice assistants or screen readers. Here are some ideas to help you get comfortable:
- Ask a family member, friend, or caregiver to help you set up these features.
- Spend a little time every day practicing simple commands or gestures.
- Use voice commands in quiet places to reduce mistakes.
- Adjust speaking speed and volume of the screen reader in settings to a level that feels comfortable.
- Keep your contact list updated with easy-to-say names to help voice assistants find people.
- Don’t hesitate to try again if the voice assistant or screen reader misunderstands you.
By practicing regularly, these tools can become natural and powerful helpers for your everyday device use, helping you stay connected and independent.
Adjusting Sound and Vibration Settings
Getting the right sound and vibration settings on your smartphone or tablet is very important. It helps you hear or feel alerts in a way that suits you best. This is especially helpful for seniors who may have changes in hearing or who want to avoid loud or confusing noises. In this section, we will explore how you can control these settings to make your device easier and more comfortable to use every day.
Think of the sound on your phone as having different parts, like the volume for ringtones, notifications, media, and system sounds. Each of these can be adjusted separately. This means you can make the ringtone loud enough so you don’t miss calls, but keep the sounds for apps or videos quieter if you prefer. It is like having different knobs for each type of sound, so you can set each one just right.
Here’s how you can adjust the volume levels:
- Go to the Settings app on your phone or tablet.
- Find and tap on Sounds and vibration.
- Tap on Volume.
- You will see sliders for different sounds: ringtone, notifications, media (like music or videos), and system sounds (sounds your device makes when you touch or do things).
- Drag each slider left or right to lower or raise the volume for that sound.
For example, if you find the ringtone too soft to hear from another room, you can raise the ringtone volume slider without changing the media volume. Or, if you like listening to music quietly but want to hear notifications clearly, you can adjust those sliders separately. This makes your phone feel just right for your ears.
If you want to quickly change the volume, you can also use the buttons on the side of your device usually called volume up and volume down. When you press these buttons, a small box appears on the screen showing you the current volume level. You can tap on the small arrow or menu in that box to see and adjust the other sound volume sliders if needed.
Choosing Sound Modes
 Your device has different sound modes to help you control how it reacts to incoming calls and alerts. These modes are:
- Sound: Your phone plays all sounds and vibrates when you receive calls or notifications.
- Vibrate: Your phone will not play sounds but will vibrate to alert you.
- Mute: No sound and no vibration. The device stays silent.
You can change these modes easily without messing up your custom volume settings by going into Settings > Sounds and vibration > Sound mode. This way, you can quickly switch to vibrate mode when you are in a quiet place, like a library or a meeting, and back to sound mode when you want to hear alerts.
Customizing Vibrations
Vibration alerts are a good way to get notifications if you don’t want your phone to make noise. You can feel the phone vibrating in your hand or pocket. This is helpful if you have hearing difficulties or don’t want to disturb others. Your device lets you control how strong the vibration is and when it happens.
To change vibration settings, you can do this:
- Open the Settings app on your device.
- Tap Sounds and vibration.
- Tap on Vibrate or Vibration intensity.
Here, you can adjust vibration strength for different things like incoming phone calls, notifications from apps, and system events (like taps or charging). If the phone’s vibration feels too soft to notice, you can make it stronger. If it feels too strong or distracting, you can make it lighter or even turn it off.
Some phones let you set different vibration patterns for different alerts. For example, you can have a short buzz for a text message and a longer buzz for a phone call. This helps you know what kind of alert you are getting just by feeling the vibration without looking at the screen.
Customizing Ringtones and Notification Sounds
Besides just volume and vibration, you can also choose what sound your phone makes for calls, messages, and other notifications. Using special or familiar sounds can help you recognize who’s calling or what type of notification is coming in without looking at the phone.
To change ringtones or notification sounds:
- Open Settings and go to Sounds and vibration.
- Tap Ringtone to pick a sound for incoming calls.
- Tap Notification sound to pick a sound for alerts like text messages or emails.
You will see a list of preset sounds. Tap any sound to hear a preview. When you find one you like, select it, and it will become your new ringtone or notification sound.
For a personal touch, you can even add your own audio files, like a favorite song or a voice recording, as a ringtone. This can make your phone feel more familiar and enjoyable to use.
Using Vibration and Sound Together
Sometimes, using both sound and vibration is helpful. When you are in a noisy place, vibration can alert you if you miss a sound. When you are in a quiet place, sound helps you notice alerts easily.
Your phone can be set to vibrate in addition to ringing, or just vibrate when it is on silent. This way, you have more than one way to know when someone is trying to contact you. Turning on features like “Vibrate on Ring” means the phone will buzz and ring at the same time, which is useful if you don’t always hear the ring loud enough.
Advanced Sound Features for Clearer Listening
Modern devices have some advanced sound tools that can help you hear better, especially if you use headphones or Bluetooth audio devices.
For example:
- Dolby Atmos: This is a special sound technology that makes music and videos sound richer and clearer. You can turn this on in Settings under Sounds and vibration → Sound quality and effects.
- Equalizer: This lets you change the tone of music or sounds. You can choose settings like bass-heavy for music or clearer voice for podcasts.
- Adapt Sound: This tool can customize the sound for each ear, making it easier to hear if you have hearing differences between ears.
These features can make listening to your favorite songs, videos, or phone calls much more enjoyable and comfortable.
Separating Sounds by App or Device
Sometimes, you might want a particular app to play sound on a different device, like a Bluetooth speaker or headset, without changing the main sound on your phone. For example, you might want to hear music on your Bluetooth speaker while notifications still play through your phone’s speaker.
You can turn on the Separate app sound feature to do this:
- Go to Settings > Sounds and vibration > Separate app sound.
- Turn it on and choose which app’s sound you want to send to a Bluetooth device.
This keeps sounds organized and less confusing, so you can enjoy music or videos without missing important alerts.
Quick Alert Features
There are also helpful settings that make sure you don’t miss important calls or messages, especially if you can’t hear the ringtone or don’t see the screen.
One example is Alert when phone picked up. With this turned on, your phone will vibrate to let you know about missed calls or messages as soon as you pick it up. This is useful if you often miss notifications when the phone was lying on a table.
You can find this feature in Settings under Advanced features → Motions and gestures. Just switch it on to start using it.
Tips for Seniors to Manage Sound and Vibration Settings
Here are some helpful hints to make your sound and vibration experience better:
- Set louder ringtones: Make sure your ringtone is loud enough so you can hear calls from another room.
- Use vibration as an extra alert: Turn on vibration along with sound so you don’t miss alerts if the ringtone is too soft.
- Choose simple, clear sounds: Pick ringtones and notifications that are easy to recognize and not too complicated or harsh.
- Test your settings: Try out different volumes and vibration levels in a quiet room to see what feels best.
- Use advanced sound features if needed: Try tools like Adapt Sound or Equalizer to improve audio clarity, especially with headphones.
- Keep volume consistent: Avoid changing volume buttons accidentally by customizing sound mode so ringtone volume stays stable.
By adjusting the sound and vibration settings carefully, you can make your device a helpful companion that fits comfortably into your daily life, keeping you connected and aware of everything important.
Customizing Home Screen Layouts
Your smartphone’s home screen is like the front door to your digital world. It’s the first thing you see when you pick up your phone, and it holds all your favorite apps, tools, and shortcuts. Making your home screen easy to use and comfortable can help you find what you need quickly and enjoy your phone more. Customizing your home screen layout means changing how your apps and widgets (small app windows) are arranged and look. This section will explain how to make your home screen simple, organized, and suited to your needs, especially if you’re new to smartphones or want things to be clear and easy to reach.
Think of your home screen like a desk. If your desk is messy with papers everywhere, it’s hard to find what you want. But if you sort your papers into neat piles or folders, it’s much easier to work. The same idea applies to your phone’s home screen—organizing apps and using space wisely can save time and frustration.
How to Move and Arrange Apps
 One of the simplest ways to personalize your home screen is by moving apps around. You can put the apps you use most often where your fingers can reach them easily. For example, if you mostly use your right thumb to tap the screen, you might want to place your important apps on the right side of the screen so you don’t have to stretch too far.
Here’s how you can do it step-by-step:
- Enter “Jiggle Mode”: This is when all your apps start to wiggle, showing that you can move them. To do this, press and hold a blank space on your home screen for a few seconds.
- Drag and Drop: Tap on an app icon, hold it, and drag it to the spot where you want it on the screen. You can move apps to different spots on the same screen or even slide them to the edge of the screen to move them to another page.
- Organize for Easy Reach: Place important apps like phone calls, messages, or health apps near the bottom or right side for easier tapping.
- Save Your Layout: After you finish arranging, tap “Done” or press the home button to save your changes and exit jiggle mode.
This process lets you decide exactly where each app goes, just like putting your keys or glasses in a special drawer you can always find.
Using Folders to Keep Apps Organized
If you have many apps on your phone, your home screen can get crowded, making it hard to find the right one. Folders help by grouping similar apps together in one place. For example, you might put all your news apps in one folder and all your games in another. This way, your screen looks neater, and you can find apps faster.
How to create and use folders:
- Create a Folder: Press and hold one app icon until it jiggles. Then drag it directly on top of another app you want to group it with. Your phone will create a new folder containing both apps.
- Name the Folder: When the folder opens, you’ll see the option to name it. Click on the name field and type something clear, like “News,” “Games,” or “Health.”
- Add More Apps: To add more apps to this folder, drag them into the folder just like you did before.
- Open and Use: When you want to use an app in the folder, simply tap the folder, then tap the app inside.
- Remove Apps: If you want to take an app out of a folder, open the folder, press and drag the app outside the folder.
Think of folders like labeled boxes where you keep similar things together so you can find what you want quickly without digging through everything.
Making Apps Bigger and Easier to See
Sometimes app icons and their names can look small, making it harder to tap or read them. Many phones allow you to make the icons larger on the home screen, which can make using your phone easier and more comfortable.
For example, with newer iPhones:
- Long-press on the background to enter jiggle mode.
- Tap “Edit” then “Customize.”
- Choose “Large” size for app icons. This makes the icons bigger and removes the small labels under them, giving your screen a cleaner look.
- If you don’t like it, you can switch back to “Small,” which returns the icons to their original size and brings back the labels.
Bigger icons mean fewer mistakes when tapping and better visibility, especially helpful if you have trouble seeing small text or icons clearly.
Adding Widgets for Quick Information
Widgets are small windows on your home screen that show helpful information without opening an app. For example, a weather widget shows the temperature and forecast, or a calendar widget shows upcoming events.
Adding widgets can make your phone more useful at a glance. Here’s how:
- Press and hold an empty space on your home screen until the apps wiggle.
- Tap “Add Widget” or “Widgets” from the menu that appears.
- Choose the widget you want from the list, like weather, calendar, or news.
- Drag the widget to the place you want it on the screen.
- Tap “Done” or press the home button to save.
Widgets give you important info right on your home screen, so you don’t have to open apps all the time. But be careful not to add too many, as they can make your phone slower or harder to use.
Choosing Backgrounds to Help You See Your Apps Better
Your phone’s background or wallpaper is the picture behind your apps. Choosing a simple, clear background can help your apps stand out and be easier to find. Bright, busy, or colorful backgrounds might make it hard to see app icons clearly.
Here are some tips for picking a good background:
- Pick a light or dark color that contrasts well with your app icons.
- A plain or simple pattern is better than a busy photo.
- A picture of a loved one or pet can still be used—you just might want to arrange your apps around it so you can see the face or important parts.
- Many phones let you darken the wallpaper behind apps to improve visibility without changing the picture entirely.
Think of it as choosing the right tablecloth for your desk. A plain tablecloth makes it easy to see your papers, but a patterned one might hide them.
Tips for Making Home Screen Use More Comfortable
Here are some extra ideas to make your phone’s home screen friendlier:
- Place frequently used apps near the bottom: This is easier to reach with your thumb, especially if you use one hand.
- Group apps by function or theme: For example, all communication apps like phone, messages, and video calls in one area, and entertainment apps like music and games in another.
- Use color to help find apps: Some phones let you change app icon colors or tint them. You can make your favorite apps bright and easy to spot.
- Keep only essential apps on the main screen: This avoids clutter and helps you find important apps quickly.
Think about your home screen like organizing a kitchen counter. You keep the items you use every day close at hand, while less-used things stay in drawers or cabinets.
Maintaining Your Customized Layout
 After you customize your home screen, it’s good to keep it organized over time. Sometimes new apps get added, or you might stop using others. Here’s how to keep your home screen neat:
- Regularly check your home screen and remove apps you don’t use, either by deleting or moving them to the app library or drawer.
- Update your folders if you get new apps in the same category.
- Adjust icon sizes or widget layout if you find it hard to use after some time.
By keeping your home screen simple and organized, your phone will stay easy and comfortable to use. And this can help you stay connected, entertained, and organized every day.
Setting Up Emergency Contacts
One of the most important things you can do to make your smartphone safer is to set up emergency contacts. Emergency contacts are special phone numbers that people like family members, close friends, or caregivers can use to help you quickly if something goes wrong. For example, if you have an accident or fall and cannot speak, the emergency responders can call these contacts to let them know you need help.
Setting up emergency contacts means you are telling your phone who to reach out to during an emergency. When you make an emergency call or use the emergency SOS feature on your phone, your device can automatically send a message to these contacts. This message can include your current location, so your loved ones know exactly where you are. This can be a lifesaver, especially if you cannot explain where you are yourself.
It’s important to know that emergency contacts are not just regular numbers in your phone. When you add someone as an emergency contact, they get special access. For example, their names appear on your Medical ID, a special screen that first responders can see even if your phone is locked. This allows them to quickly call these people without unlocking your phone, which can save valuable time in urgent situations.
Here’s how you can add emergency contacts on your smartphone, focusing on two popular kinds: iPhones and Android phones.
Adding Emergency Contacts on an iPhone
On an iPhone, you use an app called the Health app to add emergency contacts. This app also lets you create a Medical ID, which stores important health information along with your emergency contacts. Here’s how to add emergency contacts step-by-step:
- Open the Health app on your iPhone. You can find it by looking for the white icon with a red heart.
- Tap on your profile picture or icon in the top right corner. This opens your personal settings.
- Select Medical ID. If you have not set it up yet, you will see the option to create one.
- Tap Edit in the upper right corner to make changes.
- Scroll down to find Add Emergency Contact and tap it.
- Choose a contact from your phone’s contact list. It’s important that the person you want to add is already saved in your contacts; otherwise, you can’t add them here.
- Pick the relationship that best describes how you know this person, such as spouse, child, friend, or caregiver.
- Repeat the process to add more emergency contacts if you want.
- Turn on the option that says Show When Locked. This makes sure that first responders can see this information without needing your phone’s passcode.
- Tap Done to save your emergency contacts.
Once your emergency contacts are set up, they will receive a text message if you use the Emergency SOS feature on your iPhone. This message will include your location and notify them that you might need help. If your location changes, they will get updated messages so they can keep track of where you are.
Adding Emergency Contacts on Android Phones
Android phones also allow you to add emergency contacts, but the exact steps can vary depending on the phone brand and Android version. Usually, you can find the emergency settings in your phone’s main Settings app. Here is a general way to add emergency contacts on an Android device:
- Open your phone’s Settings app.
- Look for the search bar in Settings and type Emergency to find emergency-related settings quickly.
- Select the option called Emergency Information, Emergency Contacts, or something similar.
- If needed, you might have to open a special tab for emergency contacts or open your Contacts app to pick the people you want to add.
- Choose contacts from your contact list. Just like on the iPhone, the person must already be saved in your contacts before you can add them as an emergency contact.
- Save your changes.
Many Android phones also allow you to create a medical profile where you can add health information along with emergency contacts. This information can be accessed from the lock screen by first responders. Similar to iPhones, emergency contacts on Android phones receive alerts and location updates if you use emergency features like SOS calls.
Why Adding Emergency Contacts is Important
 Adding emergency contacts to your phone does more than just help you in a medical emergency. It provides peace of mind for you and your loved ones. Here’s why it’s so useful:
- Fast Help: If you cannot speak or are unconscious, first responders can quickly contact your family or caregiver to get important information about you.
- Location Sharing: Your emergency contacts get your current location automatically, so they can come to your aid or inform others.
- Medical Information Access: Emergency contacts appear on your Medical ID, helping responders understand your health needs, such as allergies or medications.
- Bypassing Phone Locks: Emergency responders can call your emergency contacts even if your phone is locked, which can save valuable time.
- Alerts Loved Ones: Your emergency contacts are notified immediately during an SOS call, reducing stress and speeding up assistance.
Think of emergency contacts as your phone’s way of carrying a digital safety net. Much like wearing a medical bracelet that shows your health info, your phone can do this and more in case of an emergency.
Tips for Choosing Emergency Contacts
When selecting who to add as emergency contacts, keep these points in mind:
- Choose Trusted People: Pick family members or friends you trust to come help if something happens.
- Make Sure They Know: Tell your emergency contacts that you have added them. They should know what it means and be ready to respond if they get a message.
- Keep Contact Info Updated: If your emergency contact changes their phone number, update it on your phone so responders can reach them.
- Add More Than One: It’s a good idea to add two or three people so there is always someone to call.
Extra Steps to Enhance Emergency Contact Features
Besides adding emergency contacts, you can also set up extra safety features on your phone for better security:
- Enable Emergency SOS: This feature lets you call emergency services quickly by pressing certain buttons on your phone. It also alerts your emergency contacts automatically.
- Create a Medical ID: Fill out your medical details like allergies, medications, blood type, and any conditions. This helps responders treat you properly.
- Set a Lock Screen Message: Some phones let you put a custom message on your lock screen, like “In case of emergency, call [Contact Name].” This can help if responders don’t know how to find the emergency info.
By setting up emergency contacts carefully and using these extra features, you make sure your phone is ready to help keep you safe. It’s a simple but powerful way to use technology to look after your health and well-being.
Enabling Magnification and Contrast Features
As we get older, our eyes may not work as well as they used to. This can make it hard to see small letters, details, or colors clearly on a smartphone or tablet screen. Luckily, modern devices come with special features that can help make the screen easier to see. Two of the most helpful options are magnification and contrast settings. These tools can make reading and using your device less tiring and more comfortable.
Magnification means making things on the screen look bigger. Contrast means making the difference between colors stronger, so it’s easier to tell what’s what. Both of these can be changed to match what feels best for your eyes. Let’s explore how these features work and how they can help you.
Why Magnification Matters
Imagine you have a small book with tiny letters. If you hold it too far away, it’s hard to read. But if you use a magnifying glass, the letters look bigger and clearer. Magnification on your device works the same way. It makes the words, pictures, and buttons look larger so you can see them more easily.
On most smartphones and tablets, you can zoom in on the screen up to several times. This means you can make a small word or picture look so big that it fills the entire screen. This helps if you have trouble reading small text or seeing details in photos or apps.
Using magnification can reduce eye strain because your eyes don’t have to work as hard to focus on tiny things. It also helps if you have conditions like presbyopia, which is when the eyes lose the ability to focus on close objects as we age.
How to Use Magnification on Your Device
 Most devices have a built-in magnifier or zoom feature you can turn on:
- Pinch to Zoom: On many touchscreens, you can use two fingers to pinch outwards to zoom in on a photo, web page, or app. Pinching inwards zooms back out.
- Screen Magnifier: This is a setting you activate that lets you zoom in on the entire screen by tapping or triple-tapping with your finger. You can move around the screen to look at different parts in detail.
- Magnifier App: Some devices have a special magnifier app that uses the camera to zoom in on real-world objects, like a label or newspaper, showing a bigger image on your screen.
There is usually an option to adjust how much you want to zoom in. For example, you can zoom in 2 times or 8 times bigger depending on what you need. Start with smaller zoom and increase it until you feel comfortable.
Remember, after zooming in, you can drag your finger across the screen to move around. This way, you can read a whole page, even if it’s very zoomed in.
Understanding Contrast and Why It Helps
Contrast is about how different colors look next to each other. High contrast means very clear differences—for example, black letters on a bright white background. Low contrast means colors are closer in shade, like gray letters on a white background, which can be hard to read.
People with vision problems often find it easier to see text and images when contrast is high. Bright colors and sharp differences help the eyes recognize shapes and letters more quickly. For example, reading black text on a white background is usually easier than reading light gray text on a white background.
Some people also find that bright white screens hurt their eyes, especially in dark rooms. That’s where contrast options like dark mode or color inversion come in. Dark mode switches the screen to show light text on a dark background, which can reduce glare and be easier on the eyes.
How to Adjust Contrast Settings
On your device, you can find several contrast and color options to improve how things look:
- High Contrast Text: This makes the text stand out more by using strong colors and bold fonts.
- Invert Colors: This flips the colors on your screen. For example, white backgrounds become black, and black text becomes white, which can be easier to see.
- Dark Mode: This changes the screen theme to mostly dark colors with light text. It reduces eye strain in low light and can save battery life.
- Color Correction: This adjusts colors for those who have difficulty seeing certain colors, like red or green, helping them see the screen better.
You can try these different modes and see which one feels best. Many devices let you switch these on and off quickly or schedule them to turn on automatically at certain times, like at night.
Tips for Using Magnification and Contrast Together
Both magnification and contrast settings can be used at the same time to give you the best viewing experience:
- Use magnification to make text or images bigger and easier to see.
- Use high contrast or dark mode to reduce glare and make letters clearer.
- Adjust these settings slowly and test what feels most comfortable. What works for one person might be different for another.
For example, if you are reading an email and the text looks too small, zoom in until it’s easier to read. If the bright white background hurts your eyes, switch to dark mode or invert colors. This way, you can enjoy reading without feeling tired or frustrated.
Practical Examples to Help You
Let’s say you want to read a recipe on your phone while cooking. The text might be too small or the kitchen light might make the screen glare.
- You can pinch to zoom in on the recipe so the letters look bigger.
- You can turn on high contrast mode so the letters stand out more clearly against the background.
- If the screen is too bright, try dark mode to make the background dark and the text light.
Another example is when you want to send a text message to a friend. If the keyboard letters seem too small, magnify the screen so you can press the right keys. You can also adjust contrast to help see the keys better.
Setting Up These Features on Your Device
To find and turn on magnification and contrast features, you usually go to the Settings menu on your device, then look for Accessibility or Display options. Here are some simple steps:
- Open the Settings app.
- Look for Accessibility or Vision settings.
- Find options like Magnification, Zoom, or Magnifier and turn them on.
- Look for Contrast settings such as High Contrast Text, Invert Colors, or Dark Mode and enable the ones you want.
- Adjust the settings for zoom level or contrast to what feels best for you.
Some devices let you add a shortcut to turn these features on or off quickly, like triple-tapping the screen. This can be handy if you only need magnification sometimes.
Remembering Comfort and Safety
While magnification and contrast help you see better, it is also important to keep your eyes comfortable. Take breaks from looking at screens often to rest your eyes. Make sure your screen brightness is not too high or too low for the room lighting. If you wear glasses, be sure to use the right pair for screen use.
Using these features does not replace visiting an eye doctor if you have serious vision problems. But they can make everyday tasks much easier and safer, helping you stay independent and confident when using your device.
Configuring Touch and Button Sensitivity
Touchscreens and buttons are the main ways we interact with smartphones. For many seniors, it might sometimes feel tricky to tap or press just the right way. Some phones might not respond well if touches are too light or too quick, or if buttons are hard to press. That’s why adjusting how sensitive your phone’s screen and buttons are can make using your device much easier and more comfortable.
Touch sensitivity means how much pressure or contact the phone’s screen needs to notice your finger. If the sensitivity is low, you might have to press harder or tap longer. If it’s too high, the phone might react to accidental brushes or touches you didn’t mean to make. Finding the right balance helps avoid frustration, especially if your fingers move slowly or you wear gloves.
Button sensitivity refers to how hard or soft you need to press physical or on-screen buttons to activate them. Some smartphones have buttons you can physically press, and others use virtual buttons on the screen. Adjusting button settings can help if you find the buttons too stiff or too sensitive.
How to Adjust Touch Sensitivity on Your Device
 Many modern smartphones have a setting to change how sensitive the touchscreen is. This setting is helpful if you use screen protectors or gloves, or if you simply want the screen to respond better to your touch.
Here’s how you can usually find this setting:
- Open your phone’s Settings by tapping the gear icon.
- Look for the Display section, where screen options are listed.
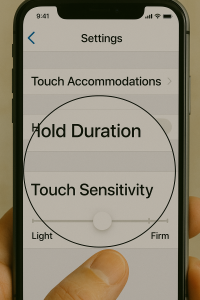
- Find an option called Touch Sensitivity or Screen Protector Mode.
- Turn this option on to make the screen more sensitive.
When this mode is on, your phone adjusts the screen so it can better detect light touches or work through screen protectors. This can make it easier to tap buttons or type on the keyboard without pressing too hard.
If your phone doesn’t have a specific “touch sensitivity” setting, there are other options to improve how it responds. For example, some phones have settings under Accessibility where you can change how long you need to touch the screen before it reacts. You can find these under Settings > Accessibility > Interaction and dexterity. Here, you might see options like:
- Tap duration: How long you must touch the screen before it counts as a tap.
- Touch and hold delay: How long you must press before it counts as holding down.
Changing these settings can help if your fingers move slowly or if you accidentally tap things too quickly.
Improving Button Responsiveness and Ease of Use
Buttons on smartphones can be physical (like volume keys) or virtual (on-screen buttons for home, back, or menu). If you find physical buttons too hard to press, or if the phone doesn’t react well to your taps, here are some things to try:
- Check for software settings: Some phones let you change how fast you must press buttons or how long you need to hold them to activate. For example, you can adjust settings for the power button or volume keys under Settings > Accessibility.
- Use AssistiveTouch or similar features: On some phones, especially iPhones but also some Android devices, you can enable a virtual button on the screen called AssistiveTouch. This feature lets you tap an on-screen button instead of physical buttons. You can customize it to perform many actions with a simple tap or swipe. This helps if pressing physical buttons is difficult due to arthritis or hand weakness.
- Use adaptive accessories: There are special styluses or phone mounts that help you tap or press buttons more easily without needing strong finger movements.
Helpful Tips to Maintain and Enhance Touch Sensitivity
Sometimes, touch sensitivity problems happen because of external factors. Here are helpful tips to keep your touch screen working well:
- Keep your screen clean: Dirt, fingerprints, and oils from your fingers can make the screen less sensitive. Wipe your screen gently with a soft, dry cloth or a special electronic wipe to keep it clean.
- Remove bulky phone cases or screen protectors: Thick cases or certain screen protectors can block touch signals or trap heat, which makes the screen less responsive. If your screen isn’t responding well, try removing these temporarily to see if it improves.
- Let your phone cool down: If your phone gets too hot from heavy use, the touch screen might slow down or not work well. Let it rest for a while and cool off before using it again.
- Use phone-friendly gloves: If you need to use your phone outside in cold weather, wear gloves made with special threads that let your finger’s electrical signals pass through. This way, you can tap and swipe without taking off your gloves.
- Restart your phone: If the screen suddenly stops responding or feels sluggish, try turning your phone off and on again. This simple step can fix small software glitches.
Fine-Tuning Sensitivity for Better Comfort
The goal of adjusting touch and button sensitivity is to make your phone easier and more comfortable to use every day. Just like adjusting the seat or mirrors in a car, tuning your phone’s settings makes the experience smoother and less frustrating.
For example, if the touchscreen feels slow to respond when you tap, increasing sensitivity helps. If you find you accidentally tap things too much, lowering sensitivity or increasing tap duration can assist. Likewise, if pressing physical buttons is painful, switching to a virtual button or AssistiveTouch can provide relief.
Remember, these settings are flexible. You can try different adjustments until you find what works best for you. If you ever feel unsure, ask a family member or a tech helper to guide you through the changes. This way, you can enjoy your smartphone’s benefits without discomfort or confusion.
Additional Accessibility Features That Support Touch Use
In case adjusting sensitivity is not enough, many smartphones offer extra accessibility tools that support easier touch interaction:
- AssistiveTouch or similar menus: These provide shortcuts and buttons on the screen to do things like return to the home screen, open the control center, or adjust volume without physical buttons.
- Touch accommodations: Settings that change how the phone reacts to touches, such as ignoring repeated taps or only responding to firm touches, can help if your hand shakes or moves unintentionally.
- Custom gestures: Some phones let you create simple gestures to replace complicated swipes or taps. For example, a single tap could open the camera instead of needing a complex swipe.
These tools reduce the effort needed to use your phone and can greatly improve your overall experience, especially if you have arthritis, hand tremors, or other motor challenges.
Why Adjusting Sensitivity Matters for Seniors
Seniors often experience changes in hand strength, skin sensitivity, and coordination. These changes can make it harder to use small screens and buttons. By customizing touch and button sensitivity, you allow your device to match your unique needs, rather than forcing you to adjust to the device.
Think of it like wearing prescription glasses to see clearly. Adjusting your phone’s touch sensitivity is like “prescription settings” that help your fingers and touch screen work well together. It makes everyday tasks—like calling a friend, sending a message, or checking the weather—much easier and more enjoyable.
Making these changes helps keep you connected to family, friends, and the world around you, giving you more independence and confidence when using technology.
How to Use Do Not Disturb to Manage Your Notifications
 When using a smartphone, sometimes you don’t want to be bothered by sounds, alerts, or messages. This is where a feature called Do Not Disturb (often called DND) comes in handy. It helps you silence your phone so it won’t ring or make noises for most calls and notifications. But don’t worry—you can still choose important people or apps to reach you, even when Do Not Disturb is turned on.
Think of Do Not Disturb like a "quiet zone" in your phone. When you enter this quiet zone, your phone stops making noise or lighting up when messages or calls come in. It helps when you want to focus on something, like reading or resting, without interruptions.
Here’s how Do Not Disturb works and how you can set it up on your smartphone for the best use:
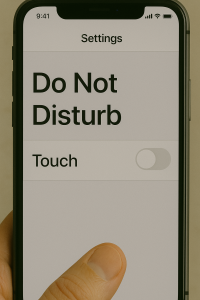
- Turning Do Not Disturb On or Off: On an iPhone, you can swipe down from the top of your screen to open the Control Center. There’s a button called “Focus” with a moon or another icon. Tap it, then tap “Do Not Disturb” to turn it on or off. You can also ask Siri, the voice assistant, to “Turn on Do Not Disturb” for you.
- Scheduling Do Not Disturb: You don’t have to turn on Do Not Disturb manually every time. You can set a schedule so it turns on and off automatically. For example, you might want Do Not Disturb to turn on every night at 10 p.m. and turn off in the morning at 7 a.m., so you sleep without interruptions. To set this up, go to your phone’s Settings, tap Focus (or Do Not Disturb), and choose “Set a Schedule.”
- Allowing Important Contacts: Sometimes, even when you want quiet, you still want to hear from family members or close friends. You can add specific people to an “Allow Notifications” list. This means calls or messages from these people will come through even if Do Not Disturb is on. You can add people by going to Settings > Focus > Do Not Disturb > Allow Notifications, then select the contacts.
- Allowing Certain Apps: Just like people, certain apps can be allowed to send notifications while Do Not Disturb is on. For example, if you want your calendar app to remind you about appointments, you can add it to the allowed apps list. This is managed in the same “Allow Notifications” section under apps instead of people.
- Focus Filters and Custom Lock Screens: Newer iPhones let you do more with Do Not Disturb by connecting it to certain Lock Screen wallpapers. This means when you switch to that wallpaper, Do Not Disturb automatically turns on. You can also use Focus Filters to control how apps behave—like hiding distracting messages or silencing some notifications while you focus.
- Intelligent Breakthrough (for newer iPhones): Some newer iPhones with the latest software can use Apple’s smart technology to decide which notifications are important enough to break through Do Not Disturb. This means important alerts will still come to you, but less important ones stay silent. You can turn this on in your Focus settings.
Using Do Not Disturb this way gives you control over when and how your phone gets your attention. It’s like creating quiet times for yourself without missing what really matters.
Making Notifications Work Best for You
Notifications are the messages, sounds, and alerts that your phone shows you when something happens. These can include texts, emails, reminders, or app updates. While notifications help you stay informed, too many can be annoying or distracting. Learning how to customize notifications helps you feel more comfortable and in control of your phone.
Here are some ways you can set up notifications to make them easier to handle:
- Choosing Which Apps Can Send Notifications: Not every app needs to send you alerts. For example, you might want notifications from your messaging app or calendar but not from a game or shopping app. To manage this, go to Settings > Notifications. You’ll see a list of your apps. Tap any app, and you can turn off “Allow Notifications” if you don’t want alerts from it.
- Deciding How Notifications Appear: Notifications can show up in different ways on your phone—on the Lock Screen, as banners (small pop-ups that appear at the top), or in the Notification Center (a list of alerts you can check anytime). You can choose where you want to see notifications for each app. This helps keep your screen neat and lets you catch alerts when it’s good for you.
- Grouping Notifications: When many notifications arrive, they can pile up. Your phone can group them by app so they don’t take up too much space. For instance, if you get several messages from one app, they will show as one group you can tap to expand. You can turn this setting on or off depending on what feels easier for you.
- Using Notification Summaries: Some phones offer a feature that collects non-urgent notifications and shows them to you all at once, at a time you choose. This is helpful if you don’t want to be disturbed by every little alert but still want to catch up later.
- Announce Notifications with Voice: If you have trouble seeing your screen or prefer to hear notifications, you can set your phone to read them out loud when they arrive. Siri can announce notifications from apps like messages or reminders, so you don’t have to look at your phone constantly. This is especially useful when you’re busy or have vision challenges.
- Turning Off Auto-Play Videos in Notifications: Sometimes, videos in apps like Photos or social media can start playing automatically, which might be distracting. You can turn off video autoplay in app settings to avoid this. This setting helps keep your phone calm and saves battery.
Customizing notifications means your phone only interrupts you when it really needs to. Think of it like setting up a helpful assistant who knows when to remind you and when to let you work or relax quietly.
Creating Personalized Quiet Times with Modes and Routines
Besides Do Not Disturb, many smartphones offer modes or routines that help you automate quiet times or specific phone behaviors. These modes can be set up for different parts of your day or activities, like sleeping, working, or exercising.
Here’s how these modes can make managing notifications even easier:
- Pre-Set Modes: Your phone might already have built-in modes like “Sleep,” “Work,” or “Driving.” Each mode can have special rules for notifications and phone settings. For example, Sleep mode might turn on Do Not Disturb at night and dim your screen to help you rest better.
- Creating Custom Modes: You can make your own mode for any situation. For instance, if you like to read without interruptions in the afternoon, you can create a “Reading” mode that silences all notifications except from certain people or apps. You can name it, choose an icon, and even set a schedule.
- Choosing Who and What Can Interrupt: In each mode, you decide which contacts or apps are allowed to send notifications. Maybe you want family to reach you anytime, but other calls or apps stay silent. You can set these rules clearly in the mode’s settings.
- Controlling Other Phone Features: Modes can also change how your phone looks and sounds. You might set the screen to grayscale (black and white) or turn on dark mode when the mode is active. You can also control volume levels, turn off keyboard sounds, or even change your wallpaper to remind you what mode you are in.
- Quick Access to Modes: You don’t have to dig into settings every time. Most phones let you quickly turn modes on or off from the Quick Settings panel, which you open by swiping down from the top of the screen.
Using modes is like having different “profiles” for your phone. Just like you might change clothes for different activities, you can change your phone’s settings to fit your day and keep distractions away when you need peace.
Tips to Remember When Setting Up Notifications and Do Not Disturb
Understanding how to control Do Not Disturb and notifications can take some practice. Here are some helpful tips to make it easier:
- Start Simple: Begin by turning Do Not Disturb on for a short time and see how it feels. Then explore adding people or apps you want to hear from.
- Customize Gradually: Adjust your allowed contacts and apps slowly. Try not to allow too many apps at once, or you might still get distracted.
- Use Schedules: Automate quiet times with schedules so you don’t have to remember to turn Do Not Disturb on or off each day.
- Check Notifications Settings Regularly: Sometimes apps update and change their notification rules. Review your settings now and then to keep them working how you like.
- Make Use of Voice Commands: If you find it hard to navigate menus, use your phone’s voice assistant to turn Do Not Disturb on or off, or to check your notification settings.
- Be Patient: It might take a little time to find the best setup for you. That’s okay! Experimenting helps you learn what makes your phone comfortable and easy to use.
By carefully setting up Do Not Disturb and notifications, you can enjoy your smartphone with fewer interruptions and more peace of mind. This helps you focus on what matters and reduces the chance of missing important calls or messages.
Empowering Your Everyday Technology Experience
 As we have explored in this lesson, taking the time to personalize your device's accessibility and comfort settings is a powerful step toward greater ease and enjoyment in your daily digital life. Adjusting font sizes and display options helps your eyes feel less strained while reading texts and menus. Enabling voice assistants and screen readers opens new doors to control and understand your device, especially if vision or touch becomes challenging.
Fine-tuning sounds and vibrations ensures you won’t miss important alerts, with settings shaped to your hearing and comfort levels. Organizing your home screen and using widgets helps simplify how you find and use your favorite apps, reducing frustration and saving time. Setting up emergency contacts adds a vital safety layer, giving you and your loved ones peace of mind. Magnification and contrast features work hand-in-hand to improve visibility in various lighting conditions, while configuring touch and button sensitivity smooths the way you interact with your device, making every tap and press just right.
Managing notifications through Do Not Disturb and customized modes helps you create quiet moments without losing touch with what matters most. Together, these settings turn your smartphone or tablet into a device that understands and supports your unique needs. By personalizing your technology, you enhance your confidence, independence, and connection with the world around you.
Remember, these changes are flexible and can be adjusted anytime—your device is meant to serve you, not the other way around. With patience and exploration, you can build a comfortable, accessible, and enjoyable tech environment that keeps you engaged, informed, and connected for years to come.
Audio
Video